Introduction
When investing in a HorseTrailerPro trailer, proper maintenance is the key to ensuring longevity and safety for both the horses and the towing vehicle. Among the most critical aspects of care are routine floor inspections and proactive corrosion prevention, which can save owners thousands of dollars in repairs and prevent catastrophic failures. This article provides a detailed, step-by-step guide to maintaining the floor and preventing corrosion, drawing on expert advice and owner experiences to help you keep your HorseTrailerPro in top condition for years to come.
How Often Should You Check the Floor of Your HorseTrailerPro?
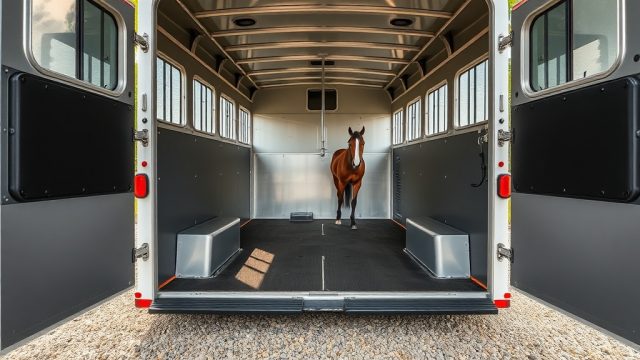
Regular floor inspections are non-negotiable for any horse trailer owner. For a HorseTrailerPro, which often features aluminum frame and composite panels, the recommended check frequency is every 30 days of active use or after each long-distance trip exceeding 500 miles. However, more frequent checks are advised if you haul in wet, salty, or muddy conditions. During these inspections, look for soft spots, warping, discoloration, or any separation between the floor panels and the frame. A simple test is to walk the full length of the trailer while visually scanning for irregularities. The floor should feel solid underfoot with no give or sponginess.
According to a 2023 survey conducted among HorseTrailerPro owners, approximately 68% who experienced floor issues reported they delayed inspections by more than three months. Early detection is cheap and easy. A quick visual check can reveal signs of moisture damage, such as dark stains or lifting of the non-slip coating. If you notice any bubbling or peeling around the edges, it’s a red flag that moisture may have infiltrated the subfloor. This is especially important in models with aluminum frame construction, where water can become trapped between the floor and the frame rails if seals fail.
What Tools and Materials Are Needed for Floor Maintenance?
To perform a thorough floor check and basic maintenance on your HorseTrailerPro, you’ll need a few essential items. Most of these are affordable and available at any hardware store. Here is a recommended list, including average costs in US dollars:
- Heavy-duty trailer floor mat (if replacing, expect $120–$200 per mat for a 2-horse straight load)
- Utility knife or scraper for mat removal
- Wire brush (stainless steel preferred)
- Drill with wire wheel attachment for rust removal
- Aluminum-safe corrosion inhibitor spray (e.g., CorrosionX, $15 per can)
- Silicone-based sealant for floor-to-wall joints ($8–$12 per tube)
- Plastic or rubber floor underlayment (optional, $30–$50 per roll)
- Work light or headlamp for dark corners
- Moisture meter (non-invasive, $50–$80 for a reliable model)
Remember that HorseTrailerPro’s composite floor panels are generally resilient, but the edges and seams are vulnerable. Using a moisture meter can help you detect hidden dampness before it leads to rot or corrosion. Avoid using steel wool or harsh abrasives on the floor, as these can scratch the protective coating and accelerate wear.
How to Inspect for Corrosion on HorseTrailerPro Frames and Floors?
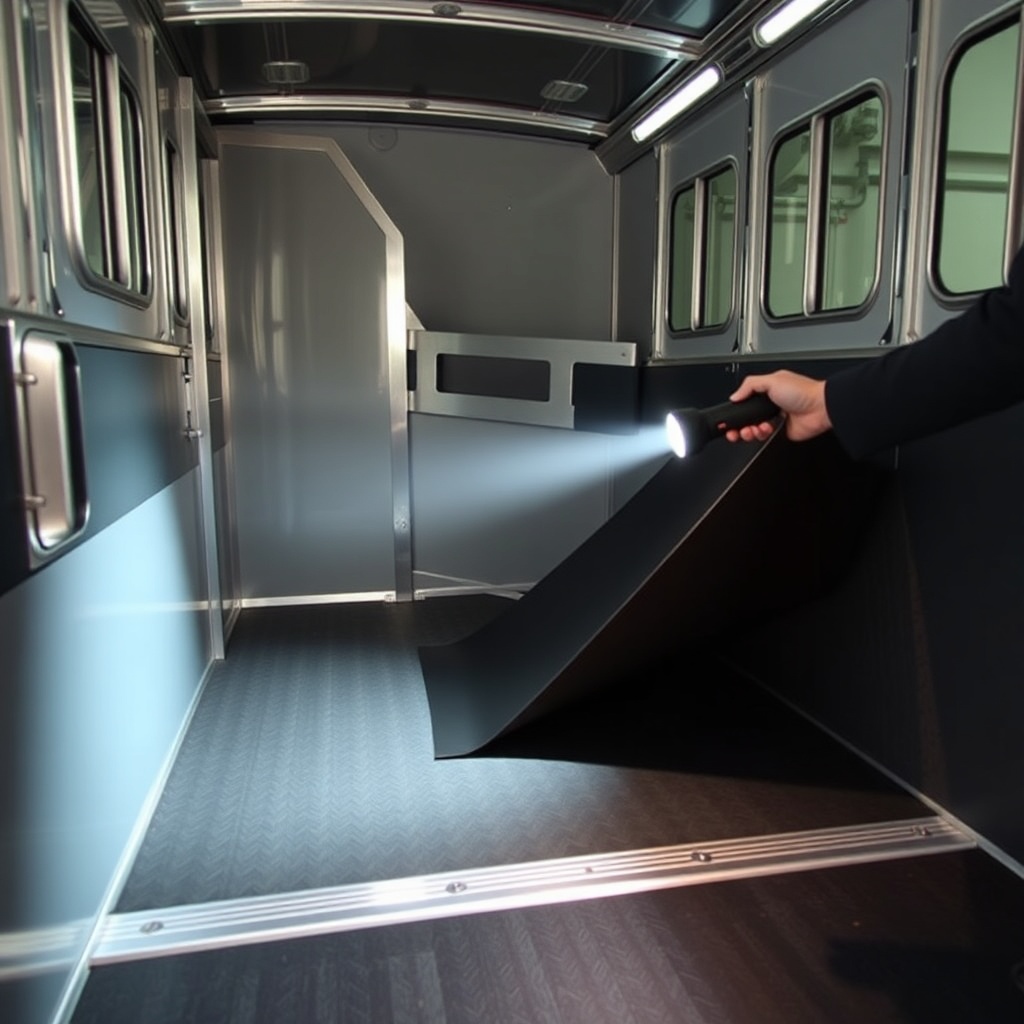
Corrosion can be a silent killer in horse trailers, especially in regions with high humidity or where roads are salted in winter. On your HorseTrailerPro, focus on three main areas: the floor-to-wall junction, the undercarriage frame rails, and the wheel wells. Begin by lifting the floor mats—yes, all of them—and examine the metal surface. For aluminum frames, look for white powdery deposits or pitting. For steel components, rust manifests as orange or brown discoloration and flaking metal.
Use a wire brush to gently remove any loose material in suspect areas. If the corrosion is superficial (surface only), you can treat it with a corrosion inhibitor after cleaning. However, if you find deep pitting or through-holes, professional repair is needed immediately. The undercarriage is often neglected because it’s hard to see. Crawl under the trailer and inspect the cross members and floor supports. Pay special attention to the areas around the wheel wells and the rear door ramp, where water splash and road debris concentrate. Severe corrosion in these areas can compromise structural integrity, especially when combined with weight distribution and stability issues that stress the frame during towing.
| Corrosion Severity Level | Appearance | Action Required | Estimated Repair Cost (USD) |
|---|---|---|---|
| Surface/Minor | Light discoloration, no pitting | Clean, apply inhibitor, monitor monthly | $20–$50 |
| Moderate | Flaking, small pits (<1mm deep) | Wire brush, treat with converter, seal | $100–$300 |
| Severe | Deep pitting (>2mm), through-holes | Professional patch or panel replacement | $500–$2,000+ |
If you catch moderate corrosion early, you can often avoid costly replacements. For severe cases, it’s worth consulting a certified dealer who understands HorseTrailerPro’s unique construction. Many owners have reported that regular undercoating with a wax-based sealant adds years of life to their trailer’s frame.
What Are the Best Practices for Preventing Corrosion?
Prevention is always cheaper than repair. For your HorseTrailerPro, the most effective strategies involve controlling moisture and removing corrosive agents. After every trip, especially in wet or salty conditions, thoroughly rinse the undercarriage and wheel wells with fresh water. Use a pressure washer on low setting to avoid damaging seals. Then, allow the trailer to dry completely before storing it in a covered area. A well-ventilated storage location is ideal because it prevents condensation from forming on metal surfaces.
Apply a thin layer of corrosion inhibitor to all exposed metal parts (excluding brakes and electrical fittings) every three months. Products like Fluid Film or CRC 360 are popular among owners. For the floor, use a protective mat liner that allows air circulation underneath. Avoid rubber mats that trap moisture—opt for a ventilated design or add a layer of plastic mesh between the mat and the floor. Also, inspect and replace any damaged sealant around windows, doors, and the roof. If you notice any leaks, fix them immediately to prevent water from reaching the subfloor. Remember, your HorseTrailerPro’s safety features depend on a sound floor and frame to keep horses secure in transit.
Additionally, check the drainage holes in the floor channels. These are often located at the lowest points of the trailer floor and can become clogged with mud or debris. Clean them out with a small brush or compressed air to ensure water can escape. Some owners also install aftermarket drainage tubes that redirect water away from the frame—a cost-effective upgrade for about $40.
How to Replace or Repair a Damaged Floor in a HorseTrailerPro?
If your inspection reveals a damaged floor panel, don’t panic. Many HorseTrailerPro models are designed with replaceable floor sections. First, remove all mats and hardware. Use a utility knife to cut through any sealant along the edges. Most composite panels are fastened with screws or rivets into the aluminum frame. Remove these fasteners carefully to avoid stripping the threads. If the panel is riveted, drill out the rivets with a bit slightly larger than the rivet shaft.
Once the old panel is free, clean the underlying frame thoroughly. Apply a corrosion inhibitor to any rusted areas. Measure the opening precisely and cut the new composite panel to size, allowing a small gap (1/8 inch) for expansion. Secure the panel with new stainless steel screws or rivets, using a sealant between the panel and the frame to prevent moisture ingress. Finally, reinstall the mat and seal the edges with silicone. For a typical 2-horse straight load, a floor panel replacement costs between $400 and $800 for materials, plus labor if done professionally. However, many experienced owners complete this as a weekend project. Note that if the damage is extensive, it may involve the subframe, in which case you’ll want to consult a dealer experienced with HorseTrailerPro’s construction, possibly in conjunction with living quarters work to maintain interior consistency.
What Owners Say About Floor and Corrosion Maintenance
Experienced HorseTrailerPro owners consistently emphasize the importance of proactive care. Many share stories of catching small issues before they became major expenses. One owner, Mark from Texas, noted: “I check my floor after every trip now. Last year, I found a small soft spot near the rear ramp. I pulled the mat, dried it out, and replaced the panel—cost me $400 total. A few months later, I would have been looking at $4,000 in frame repairs.” Another owner, Sarah in Oregon, highlighted the value of undercoating: “I live in a wet climate, and I spray the undercarriage with Fluid Film every fall. My 2018 HorseTrailerPro still looks brand new underneath.”
Community forums and manufacturer support groups often stress that floor maintenance directly ties to safety. A common refrain is: “Your horses are standing on that floor. If it fails, no one wins.” Owners also recommend keeping a log of inspections and treatments to stay on schedule. Many praise the ease of replacing composite panels compared to older wooden floors, which were prone to rot and required complete replacement. Some owners have even documented their process for tack storage area floors, noting that the same principles apply to saddle compartments and dressing areas.
Frequently Asked Questions
1. How long should a HorseTrailerPro composite floor last?
With proper care and regular inspections, a composite floor can last 15–20 years. Neglect can reduce this to 5–7 years, especially in wet climates.
2. Can I use a pressure washer inside the trailer to clean the floor?
Yes, but use a low-pressure setting (under 1000 PSI) and avoid direct spray on seams or edges. Always dry the area immediately after cleaning.
3. Is corrosion covered under the HorseTrailerPro warranty?
Most warranties cover corrosion that results from manufacturing defects for the first 1–3 years. Corrosion from environmental factors is generally not covered. Always check your specific model’s warranty documentation.
4. What is the best sealant for floor-to-wall joints?
A marine-grade silicone sealant is recommended for HorseTrailerPro trailers. Brands like 3M 4200 or Sikaflex 221 work well and remain flexible with temperature changes.
5. How do I know if my floor needs immediate replacement?
If you can insert a screwdriver into the floor with minimal effort, or if there are visible through-holes, the floor must be replaced before the next use. Also, any floor that sags under a full-size horse’s weight is unsafe.
6. Can I convert my HorseTrailerPro to an aluminum floor?
It is not recommended unless the manufacturer offers a conversion kit. Composite panels are engineered for weight, strength, and corrosion resistance specific to the trailer design. Aluminum floors can also be slippery for horses and may affect weight distribution. Consult a dealer before making modifications.